
Imagine a warm, crusty sourdough bread bowl, golden and crisp on the outside, soft and tangy on the inside, just waiting to be filled with your favorite creamy soup. Sounds like heaven, right? Trust me, once you try making these homemade sourdough bread bowls, you’ll never go back to store-bought again! Not only do they taste better, but they also make your meal feel extra special. Let’s dive into this amazing recipe and get baking!
Why You’ll Love This Sourdough Bread Bowl
- Perfectly crispy and chewy – The crust stays strong enough to hold hot soups without getting soggy.
- That signature sourdough tang – A naturally fermented flavor that beats any regular bread bowl.
- Fun to eat – Tear, dip, and enjoy every last bite!
- Versatile – Works for soups, dips, or even as a unique serving dish.
- No commercial yeast – Made with just wild fermentation, giving it deep, rich flavor.
What Makes Sourdough Bread Bowls Special?
Unlike regular bread bowls made with yeast, sourdough bread bowls are naturally fermented, giving them that slightly tangy taste and airy texture. The magic lies in the sourdough starter, which is a mix of wild yeast and bacteria that helps the dough rise and develop complex flavors. Plus, sourdough has better digestibility and nutrition compared to regular bread!
Ingredients You’ll Need for Sourdough Bread Bowls
Ingredients:
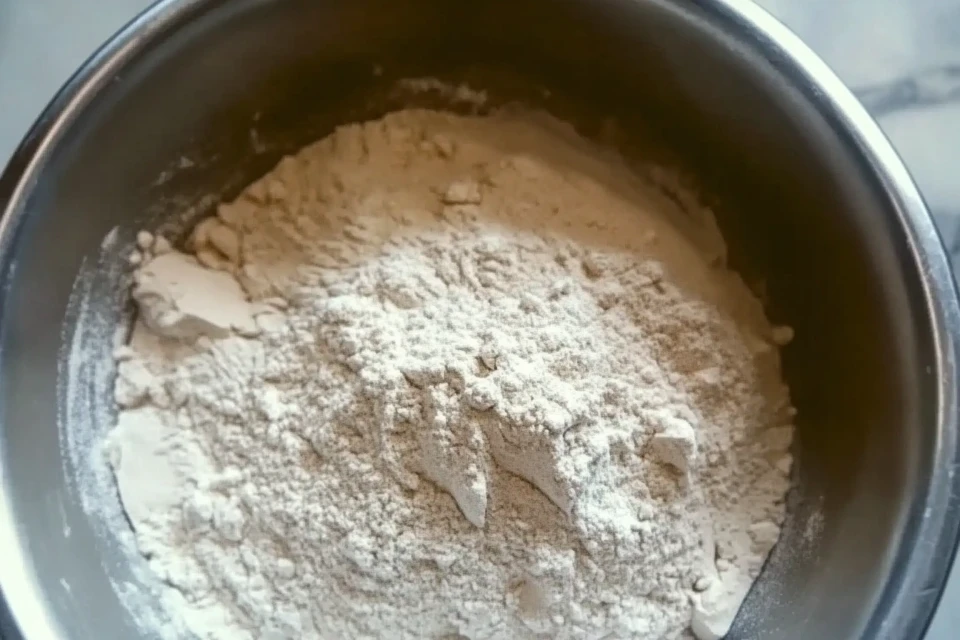
- 3 ½ cups (450g) bread flour – High protein content helps create a chewy texture.
- 1 ¼ cups (300ml) water – Hydrates the dough and activates the starter.
- ½ cup (120g) active sourdough starter – The heart of the bread; make sure it’s bubbly and fresh.
- 1 ½ teaspoons salt – Enhances the flavor and strengthens the dough.
Note: If you don’t have a sourdough starter, you’ll need to make one first. It takes about a week to develop, but it’s totally worth it!
Choosing the Best Flour for Sourdough Bread Bowls
Not all flours are created equal, and when making sourdough, you want a strong, high-protein flour. Here’s a quick guide:
- Bread flour: Best choice for a chewy, structured bowl that won’t collapse under soup.
- All-purpose flour: Works but may result in a softer, less sturdy bread bowl.
- Whole wheat flour: Adds nutty depth but should be mixed with bread flour to avoid heaviness.
Step-by-Step Guide: How to Make a Sourdough Bread Bowl
Step 1: Preparing the Sourdough Starter
If your sourdough starter has been sitting in the fridge, you’ll need to wake it up! Feed it with equal parts flour and water and let it sit at room temperature for 4–6 hours. It should be bubbly, active, and ready to use.
Step 2: Mixing & Kneading the Dough
- In a large mixing bowl, combine bread flour and salt.
- Add the sourdough starter and water, then mix until you get a shaggy dough.
- Cover and let it rest for 30 minutes (this helps with hydration).
- After resting, knead the dough for about 8–10 minutes until it becomes smooth and elastic.
Tip: If kneading by hand, use the “stretch and fold” method to build gluten strength.
Step 3: Bulk Fermentation & First Rise
Now, it’s time for fermentation—where the magic happens! Place the dough in a greased bowl, cover it, and let it sit at room temperature for 8–12 hours (overnight is best). It should double in size.
Common Problem: Dough isn’t rising? It might be too cold. Try placing it in a slightly warm spot (like inside an oven with the light on).
Step 4: Shaping the Bread Bowl
Once your dough has doubled in size, it’s time to shape it into perfect bread bowls. This step is super important because a well-shaped dough will hold its structure while baking. Follow these easy steps:
- Lightly flour your work surface and turn out the dough.
- Divide it into equal portions (this recipe makes about 2-3 medium-sized bread bowls).
- Shape each portion into a round ball by gently pulling the sides toward the center, then tucking them underneath.
- Place each shaped dough ball on a parchment-lined baking sheet.
Pro Tip: Want extra round, tight bread bowls? Let them rest for 10 minutes before doing a final tightening stretch.

Step 5: Second Rise & Baking to Perfection
Now, we give our dough a second proof to ensure that beautiful oven spring.
- Cover the shaped dough loosely with a damp towel and let it rest for 1–2 hours at room temperature.
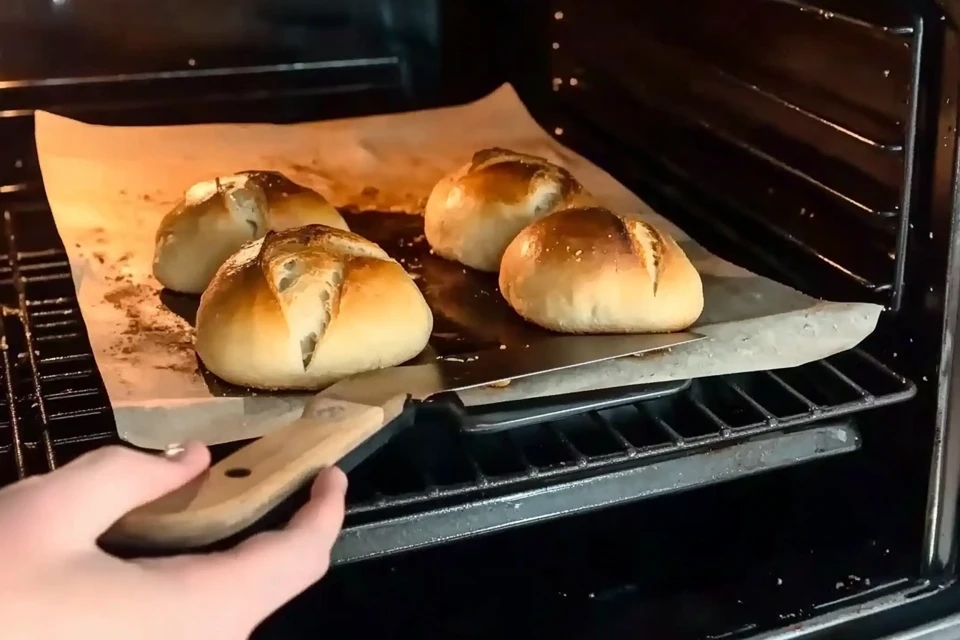
- Meanwhile, preheat your oven to 450°F (230°C) and place a Dutch oven or baking stone inside.
- When the dough looks puffy and ready, score the tops with a sharp knife (a simple cross or circle works best).
- Carefully place the dough inside the preheated Dutch oven (or directly on the hot baking stone).
- Bake for **20 minutes covered**, then remove the lid and bake for another **15–20 minutes** until golden brown.
Your kitchen will smell absolutely amazing at this point!
Pro Tips for the Best Sourdough Bread Bowl
- For an extra crispy crust: Place a small pan of water in the oven to create steam.
- Want a deeper sour flavor? Let the dough ferment in the fridge overnight.
- For uniform bowls: Weigh each dough ball before shaping.
Common Mistakes & How to Avoid Them
Mistake #1: The Bread Bowl Collapsed
Cause: The dough was under-proofed or over-proofed.
Solution: Check that your dough doubles in size during the first rise, but don’t let it go too far! In the second rise, it should be slightly puffy, not flat.
Mistake #2: The Crust Is Too Hard
Cause: The bread was overbaked or didn’t have enough steam.
Solution: Reduce baking time slightly and add a steam tray in the oven.
Mistake #3: The Inside Is Doughy
Cause: The bread wasn’t fully baked.
Solution: Use a thermometer—bread is done when the internal temperature is **200°F (93°C)**.
How to Hollow Out a Sourdough Bread Bowl Without Ruining It
Now that you’ve got beautiful bread bowls, let’s carve them out properly!
- Let the bread cool completely—this prevents tearing.
- Use a sharp knife to cut a circle in the top (like a pumpkin lid!).
- Gently remove the center, leaving about **½ inch of bread** along the sides and bottom.
- Save the insides! They make great croutons or breadcrumbs.
Bonus Tip: Brush the inside with melted butter and toast for a sturdier, crunchier bowl!

Best Soup & Dip Ideas for Your Sourdough Bread Bowl
Now for the fun part—filling your bread bowl with something delicious! Here are some must-try pairings:
Classic Soups That Pair Perfectly
- Cheddar Broccoli Soup – That creamy, cheesy goodness inside a tangy bread bowl? Yes, please!
- Clam Chowder – A seafood classic that complements the sourdough flavor.
- Tomato Basil Soup – The ultimate comfort food.
- Loaded Baked Potato Soup – Because who doesn’t love a creamy, bacon-filled soup?
Creative Dip Ideas for Bread Bowl Snacks
- Spinach & Artichoke Dip – Creamy, cheesy, and totally irresistible.
- Buffalo Chicken Dip – Perfect for game day or parties.
- Garlic Parmesan Cheese Dip – A bold, flavorful choice for garlic lovers.
Sourdough Bread Bowl Variations & Customizations
Whole Wheat, Rye, or Gluten-Free Sourdough Options
If you want to switch things up, try using different flours:
- Whole wheat: Adds a nutty depth but requires more hydration.
- Rye flour: Gives a deep, earthy flavor (best mixed with bread flour).
- Gluten-free: Needs special sourdough starter and a different hydration balance.
Adding Herbs, Cheese, or Other Flavors
Want to make your bread bowl even more exciting? Try these mix-ins:
- Fresh herbs: Rosemary, thyme, or basil add wonderful aroma.
- Cheese: Parmesan or cheddar mixed into the dough makes it extra flavorful.
- Garlic butter glaze: Brush it on before baking for a golden, fragrant crust.
How to Store & Reheat Sourdough Bread Bowls
So, you’ve made these gorgeous sourdough bread bowls—now, how do you keep them fresh? Luckily, sourdough has a longer shelf life than regular bread, thanks to its natural fermentation.
Best Ways to Keep Your Bread Bowl Fresh
- Short-Term Storage: If you’re using your bread bowls within a day or two, store them in a **paper bag** or a **bread box** to keep the crust crisp.
- Long-Term Storage: Wrap them in **plastic wrap** or a **zip-top bag**, then freeze for up to **3 months**.
How to Reheat Without Drying Out
Reheating bread bowls the right way ensures they stay crispy on the outside while soft inside. Here’s how:
- Oven Method (Best for Whole Bread Bowls): Preheat to **350°F (175°C)** and bake for **10 minutes** until warm.
- Air Fryer Method: Heat at **325°F (160°C)** for **5–7 minutes** for a crispy texture.
- Microwave Method (Not Recommended): This makes the bread chewy rather than crispy.
Tip: If your bread feels dry after reheating, lightly mist it with water before warming it up!
FAQs About Sourdough Bread Bowls
Can I Make Sourdough Bread Bowls Without a Starter?
Nope! A sourdough bread bowl requires a starter because it’s naturally leavened. If you don’t have one, you can create a starter from scratch, but it takes about **7 days**.
Why Did My Bread Bowl Collapse?
Common reasons include over-proofing, under-proofing, or weak gluten development. Make sure to knead well, proof correctly, and bake at the right temperature.
How Can I Make a Smaller or Larger Bread Bowl?
Simply divide your dough into smaller or larger portions before shaping. For mini bread bowls, **use 100g of dough per bowl**; for larger ones, **use 300g or more**.
Can You Freeze Sourdough Bread Bowls?
Absolutely! Once cooled, wrap them tightly in plastic wrap, then store in a freezer-safe bag. To use, let them thaw at room temperature and reheat in the oven.
That’s it! You are now an expert in sourdough bread bowls. These bowls enhance the texture and flavor of your food in addition to being a lovely way to serve soup. For those who enjoy making their own bread, this recipe is revolutionary, whether you choose to dip, scoop, or just take off bits.
What comes next? To wow your family and friends, try filling your bread bowl with your favorite soup, experimenting with new flavors, or even baking a batch. I promise you won’t ever use store-bought bread bowls again when you taste the difference!