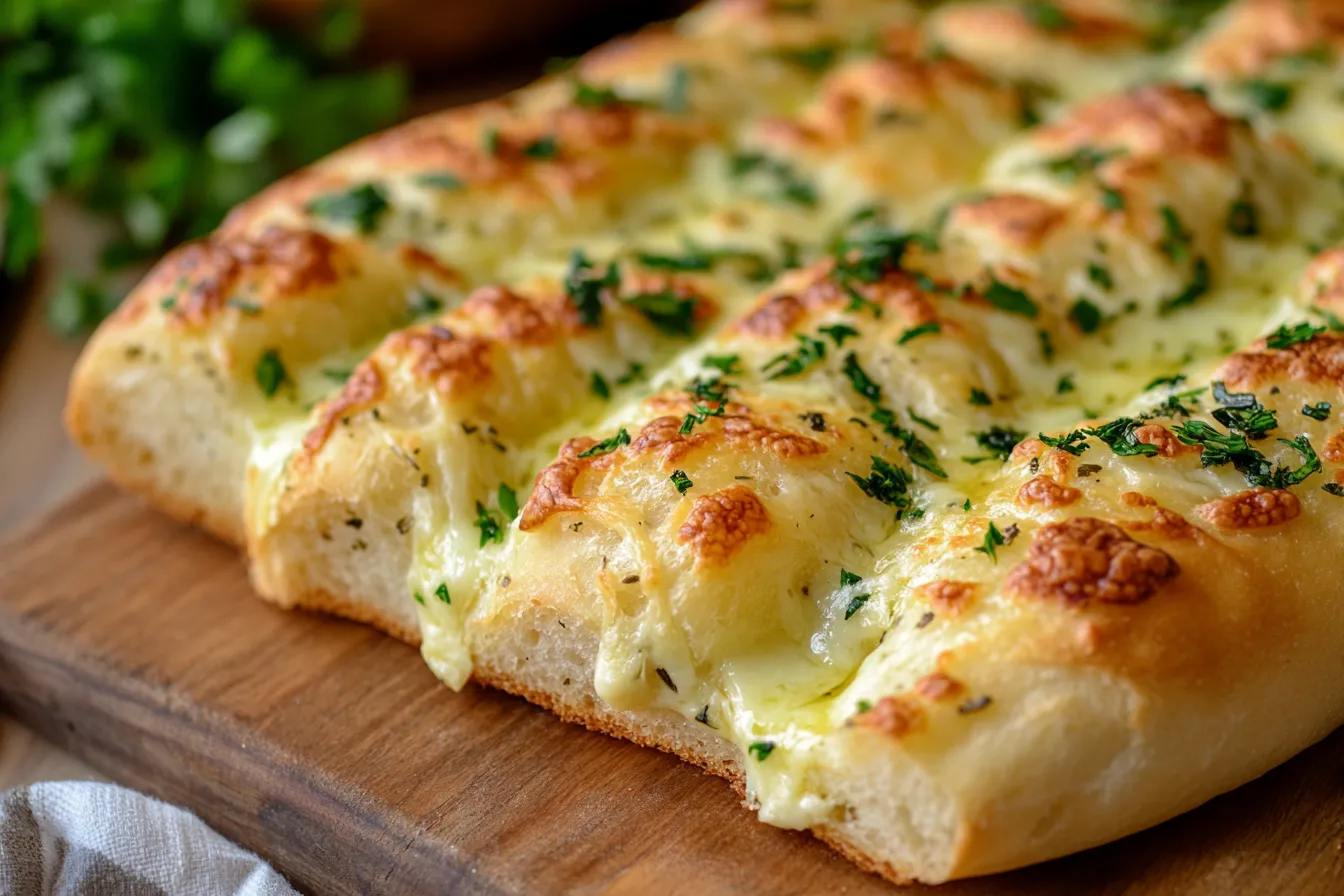
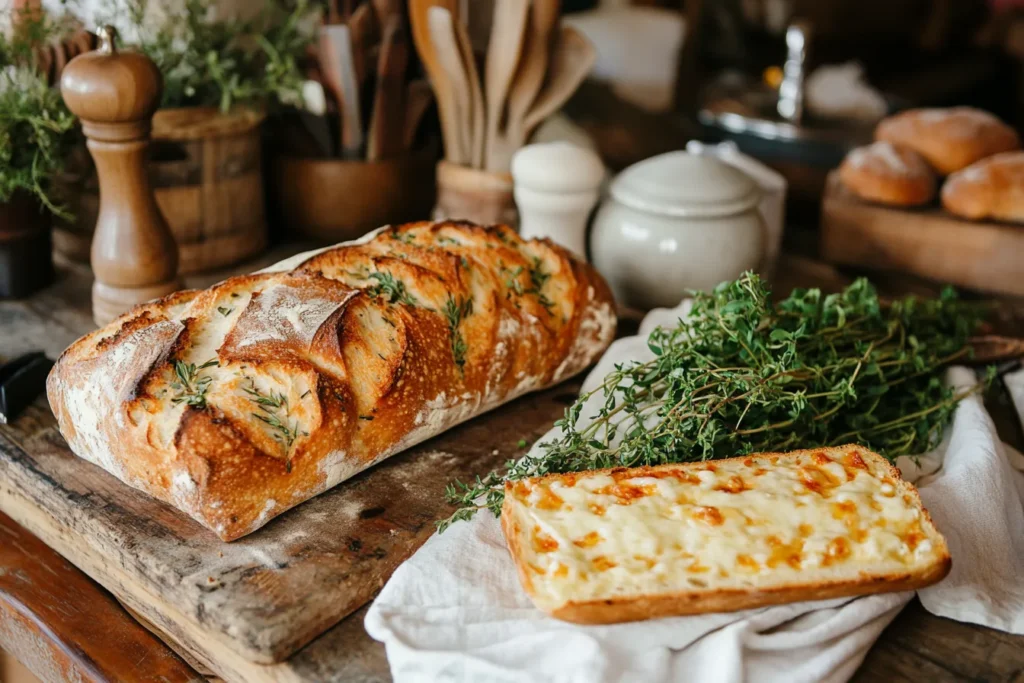
Okay, let’s be honest—bread is already awesome. But Italian Herbs and Cheese Bread? That’s on a whole other level. It’s fluffy, flavorful, and covered in gooey cheese with a punch of herbs that’ll make your whole kitchen smell like a bakery in Italy. 😍
If you’ve ever walked into a Subway and your nose caught a whiff of their famous Italian herbs and cheese bread… you know exactly what we’re talking about. And guess what? You can make it at home—and maybe even better!
What is Italian Herbs and Cheese Bread?
It’s a soft, golden loaf of bread that’s seasoned with Italian-style herbs and topped with shredded cheese that melts and toasts as it bakes. Think garlic, oregano, basil, and a cheesy, crispy crust. It’s basically what dreams are made of—if your dreams involve carbs (and let’s be real, whose don’t?).
A Flavorful Twist on Classic Bread
This isn’t just your regular sandwich bread. It’s what happens when boring bread gets a glow-up. The inside stays soft and pillowy, while the outside gets this cheesy, herby crunch that’s perfect on its own—or even better as the base for a killer sandwich.
Why It’s So Popular (Thanks, Subway!)
Subway made this bread famous worldwide. It’s their best-selling sandwich bread for a reason. But the cool thing is, when you make it at home, you can level it up—use better cheese, fresh herbs, or even make it gluten-free if that’s your thing.
“Italian Herbs and Cheese Bread is proof that bread doesn’t have to be boring. It’s bread with personality.”
Key Ingredients That Make It Irresistible
So what’s the secret sauce (well, not literally) that makes this bread so irresistible? It’s all about the herbs, the cheese, and the base dough. Let’s break it down.
The Best Herbs to Use (Fresh vs. Dried)
You’ve got two options here: fresh herbs for bold, garden-fresh flavor, or dried herbs for convenience and a more concentrated taste. Most people use a mix like this:
- Oregano – the backbone of that “Italian” flavor
- Basil – adds sweetness and aroma
- Parsley – for freshness and color
- Garlic powder – because garlic is life
- Onion powder – boosts the savory notes
You can sprinkle these into the dough or just use them as a topping mixed with the cheese—it’s totally up to you.
Cheese Choices: Mozzarella, Parmesan, or More?
Now to the fun part—cheese. Most versions use a blend of mozzarella and Parmesan, but you can totally get creative. Try:
- Asiago – sharp and nutty
- Cheddar – melty and bold
- Romano – salty and tangy
The goal is to get that golden brown, bubbly top that makes your bread look like it came from a bakery window.
Ideal Flour and Yeast for a Perfect Rise
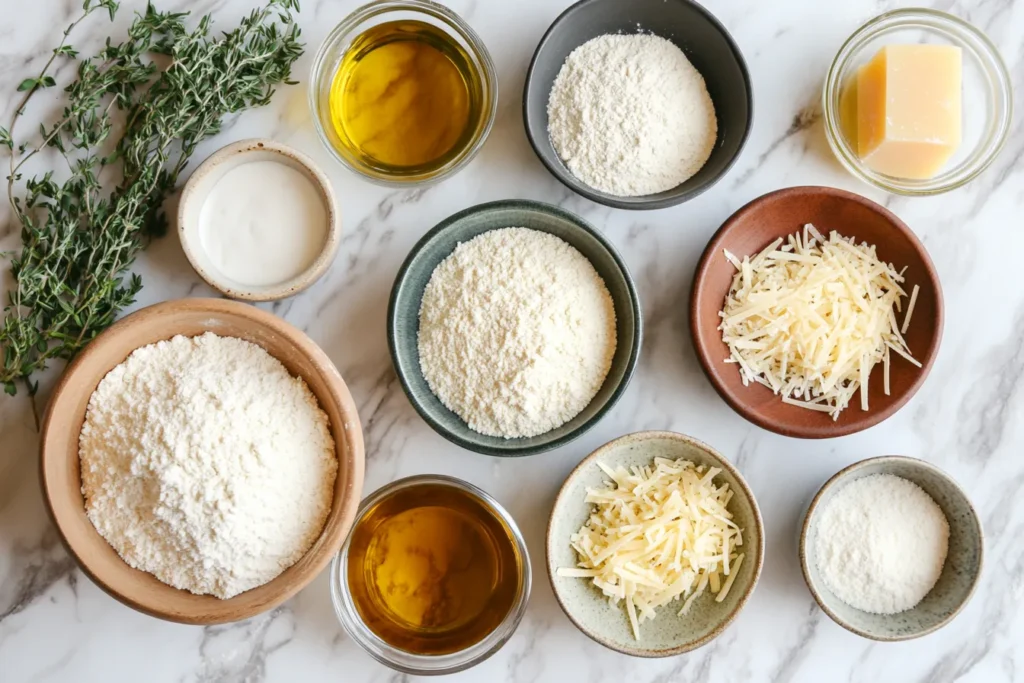
You don’t need anything fancy—just all-purpose flour or bread flour will do. Bread flour gives a slightly chewier texture, which is perfect for this kind of bread. As for yeast, use active dry or instant yeast—they both work great.
| Ingredient | Quantity |
|---|---|
| All-purpose flour | 3 ½ cups |
| Warm water (110°F) | 1 ¼ cups |
| Active dry yeast | 2 ¼ tsp (1 packet) |
| Sugar | 1 tbsp |
| Salt | 1 tsp |
| Olive oil | 2 tbsp |
| Dried Italian herbs | 1 tbsp |
| Shredded cheese (mozzarella & Parmesan blend) | 1 cup (for topping) |
Step-by-Step Recipe: Italian Herbs and Cheese Bread at Home
Ready to bake like a pro? This step-by-step guide will walk you through the process of making your own cheesy, herby bread right at home. No fancy machines needed—just your hands, your oven, and your appetite. 🍞🧄🧀
Ingredients and Measurements
You’ve already seen the ingredient list in the table above, but here’s a quick recap so you don’t have to scroll:
- 3 ½ cups all-purpose flour
- 1 ¼ cups warm water (not hot!)
- 2 ¼ tsp active dry yeast (or 1 packet)
- 1 tbsp sugar
- 1 tsp salt
- 2 tbsp olive oil
- 1 tbsp dried Italian herb mix
- 1 cup shredded cheese (mozzarella + Parmesan blend works great)
Dough Preparation and Proofing Tips
- Activate the yeast: Mix the warm water, sugar, and yeast in a bowl. Let it sit for 5–10 minutes until it looks foamy.
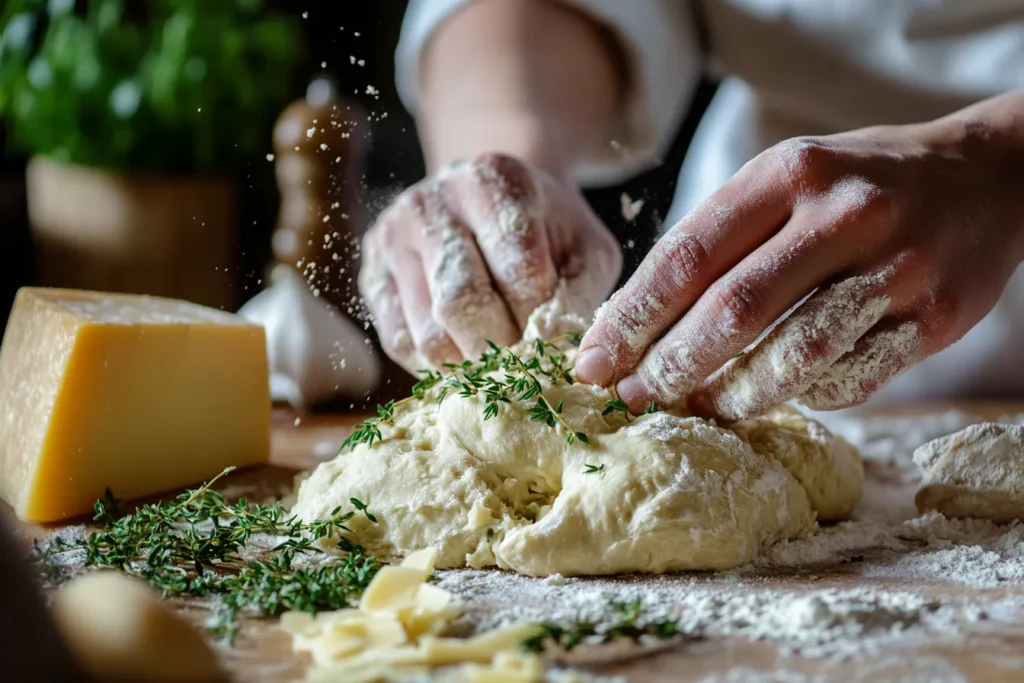
- Mix the dough: In a large bowl, combine flour, salt, herbs, and olive oil. Add the yeast mixture and stir until it forms a soft dough.
- Knead it: Turn the dough out onto a floured surface and knead it for about 8 minutes until smooth and stretchy. It’s like giving the dough a little workout!
- Let it rise: Place the dough in a greased bowl, cover it with a towel, and let it rise for 1 hour in a warm spot. It should double in size—like magic!
“Patience is key! If your dough doesn’t rise enough, your bread will be dense and sad. Give it time and warmth, and it’ll reward you.”
Baking Time, Temperature, and Final Touches
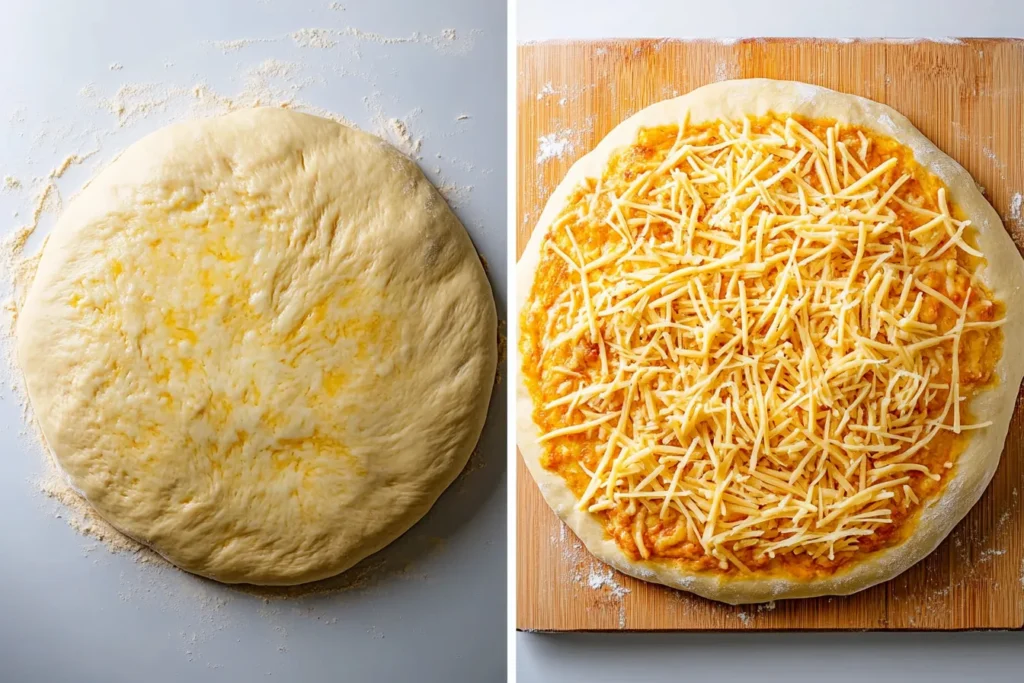
- Shape the dough: Punch it down (gently!), shape it into a loaf or baguette-style shape, and place it on a baking sheet lined with parchment paper.
- Second rise: Let the shaped dough rest for another 30 minutes while your oven preheats to 375°F (190°C).
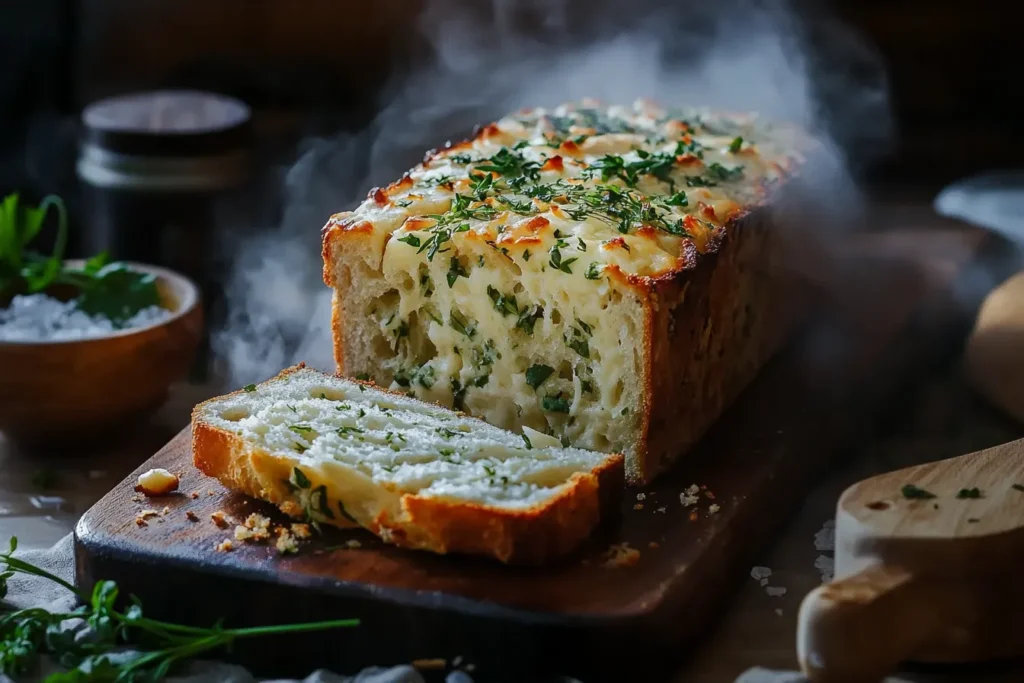
- Top with cheese: Brush the loaf with olive oil or melted butter, then generously sprinkle the shredded cheese and more herbs on top.
- Bake: Pop it in the oven for 20–25 minutes until the top is golden brown and the bottom sounds hollow when tapped.
- Cool and enjoy: Let it cool for 10 minutes before slicing. The smell will be hard to resist, but trust us—it’s worth the wait!
Common Problems When Making Herb and Cheese Bread
Don’t worry if your first loaf doesn’t come out perfect. Bread baking is part art, part science—and a little messy magic in between. Let’s fix the most common issues you might face.

Why Did My Bread Not Rise Properly?
This one’s super common. If your dough didn’t rise like it should have, here are a few reasons why:
- Your yeast was old or dead – Always check the expiration date. If it didn’t foam, it didn’t activate.
- The water was too hot – Hot water can kill yeast. Aim for warm, not boiling (around 110°F or 43°C).
- Room was too cold – Dough needs a cozy, warm spot to rise. Try placing it in an oven with just the light on.
Too Dry, Too Dense, or Overbaked? Here’s the Fix
Dry or heavy bread can be a real letdown. But don’t panic—we’ve got your back.
- Don’t over-knead – It makes the bread tough. 8 minutes is usually enough for this recipe.
- Use a thermometer – Bread is done at around 190°F (88°C) inside. If you’re baking too long, it’ll dry out.
- Add moisture – A small pan of water in the oven while baking can help keep things soft and steamy.
Cheese Burning on Top: What Went Wrong?
We all love crispy cheese, but burnt? Not so much. Here’s how to avoid that burnt-top situation:
- Cover with foil halfway through baking if it’s browning too fast.
- Use lower-fat cheese – Some cheeses burn faster due to high fat/oil content.
- Shred your own cheese – Pre-shredded cheese often contains anti-caking agents that mess with baking.
“If your bread looks like a burnt pizza crust, don’t toss it—scrape off the top and pretend it’s rustic!” 😉
Pro Tips for Flavor and Texture Perfection
So you’ve got the basics down—but wanna bake bread that tastes like it came from a bakery? These expert tips will help you boost flavor, texture, and presentation like a boss.
How to Keep the Bread Moist and Fluffy
- Use milk instead of water: Swap part of the water for warm milk to make the dough richer and softer.
- Add a bit of butter: A tablespoon of butter mixed into the dough gives it a soft, melt-in-your-mouth texture.
- Steam during baking: Place a small dish of hot water in the oven to create steam—it keeps the bread moist inside with a golden crust outside.
Herb and Cheese Layering Tricks for Even Taste
Don’t just dump everything on top! To get flavor in every bite:
- Mix half of the cheese and herbs into the dough.
- Sprinkle the rest on top before baking for that Insta-worthy cheesy crust.
- Brush with garlic-infused olive oil for extra depth. 😋
How to Make the Crust Extra Crispy (or Extra Soft)
- Crispy crust: Bake at a slightly higher temp (400°F), and brush the top with olive oil before and after baking.
- Soft crust: Cover the bread with a clean towel right after it comes out of the oven—it traps moisture and softens the outer layer.
“Bread is like music—some like it loud and crunchy, others soft and mellow. The choice is yours.” 🎵🍞
Pairing Ideas: What Goes Best With Italian Herbs and Cheese Bread?

This bread isn’t just a sidekick—it’s the main event! But if you want to level up your meal, try these perfect pairings:
Dips, Soups, and Sandwich Combinations
- Tomato soup: The classic cheesy bread + tomato combo is always a winner.
- Marinara or garlic butter dip: Dip it like a breadstick and thank us later.
- Make it a sandwich: Load it with grilled chicken, roasted veggies, or turkey and arugula for a gourmet experience.
Serving it at Brunch, Lunch, or Dinner
This bread is a total chameleon. Serve it at:
- Brunch – alongside scrambled eggs or frittata
- Lunch – as sandwich bread or with soup
- Dinner – next to pasta, lasagna, or grilled meats
Storing and Reheating Your Homemade Bread
Made a big batch? No worries. Italian herbs and cheese bread stores and reheats like a dream—if you do it right.
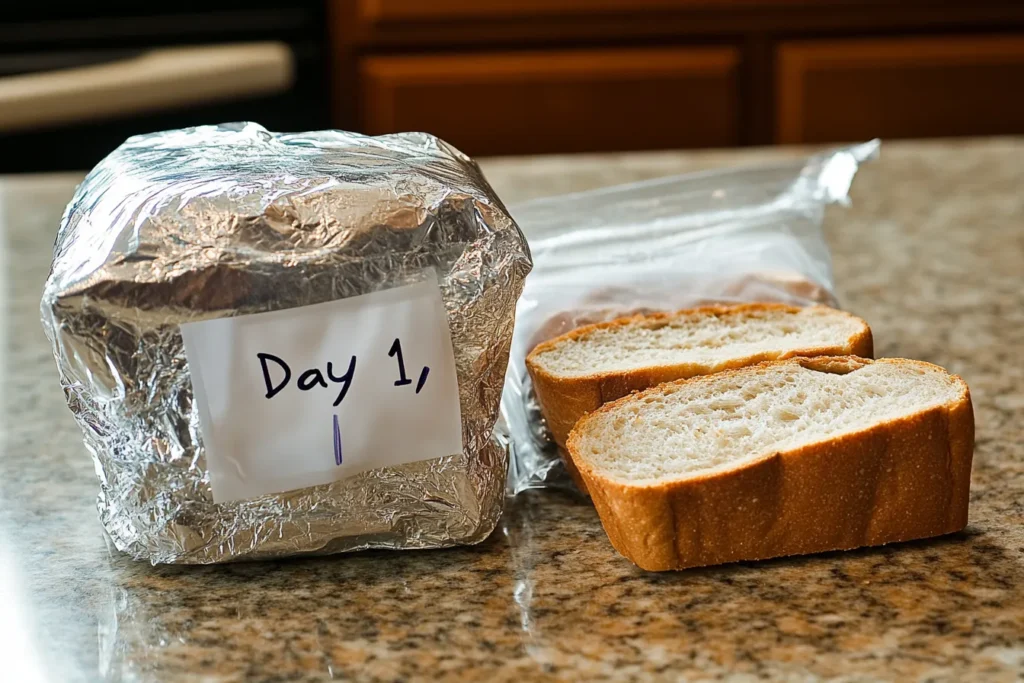
Best Storage Methods to Keep it Fresh
- Wrap in foil or plastic and store at room temp for 2–3 days.
- Keep it in a bread box to avoid it drying out or getting soggy.
Freezing and Reheating Tips
- Freezing: Slice it, wrap it tightly in plastic, then foil, and freeze up to 2 months.
- Reheating: Toast frozen slices or reheat in the oven at 300°F wrapped in foil for 10–15 minutes.
“Leftover bread = tomorrow’s snack. Just warm it up, and it’s like fresh from the oven all over again.” 🔥
Italian vs. American Variations: What’s the Difference?
This bread may scream « Italy, » but it’s actually more of an Italian-American creation. Let’s compare!
Traditional Italian Bread with Herbs
In Italy, you’ll find pane alle erbe—herb bread made with rosemary, thyme, and olive oil, usually without cheese. It’s simpler but super flavorful.
How American Versions Add the Cheese Factor
In the U.S., we take things up a notch—cheese, garlic, butter, and more cheese! It’s all about bold flavor and texture. No shame in that game.
FAQs About Italian Herbs and Cheese Bread
Can I Make it Gluten-Free?
Absolutely! Just use a 1:1 gluten-free flour mix and add a bit more moisture (gluten-free dough tends to be drier). Xanthan gum helps with texture too.
Can I Use a Bread Machine or Air Fryer?
- Bread machine: Yes! Use the dough setting, then shape and bake in the oven.
- Air fryer: For small loaves or rolls, totally doable! Cook at 350°F for 12–15 minutes.
How Long Does It Last After Baking?
At room temp: 2–3 days. In the fridge: up to 5 days (but may get a bit chewy). In the freezer: up to 2 months.
Final Thoughts: Why This Bread is Worth the Effort
Let’s be real—homemade bread takes a little time. But when that first cheesy, herby bite hits your tastebuds? Totally worth it. Plus, you get full control over what goes in it, how crispy or soft you want it, and how cheesy you dare to go. 💯
Whether you eat it solo, dip it, slice it, or stack it, Italian Herbs and Cheese Bread brings the flavor every single time. Go ahead, try it once—you’ll be baking it on repeat in no time.
“You don’t need to be a chef to make bakery-quality bread. Just bring the love (and cheese).” 🧀❤️